

How We Replaced a Chainplate on a Floating Boat in Tahiti
(Without a Haul-Out!)
3 min read
Disclaimer: All boat terms explained at the end of the text ⛵
🚨 The Problem
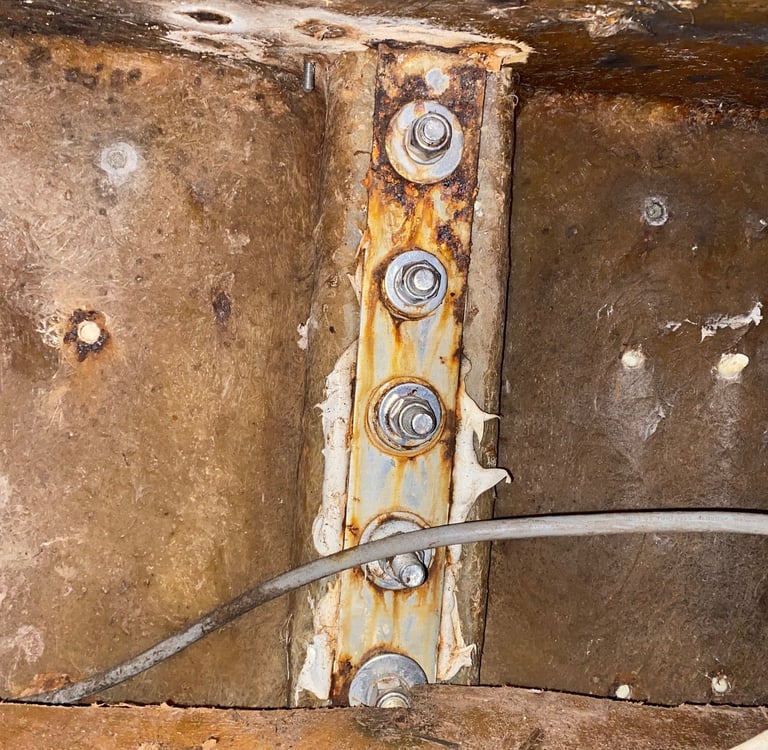
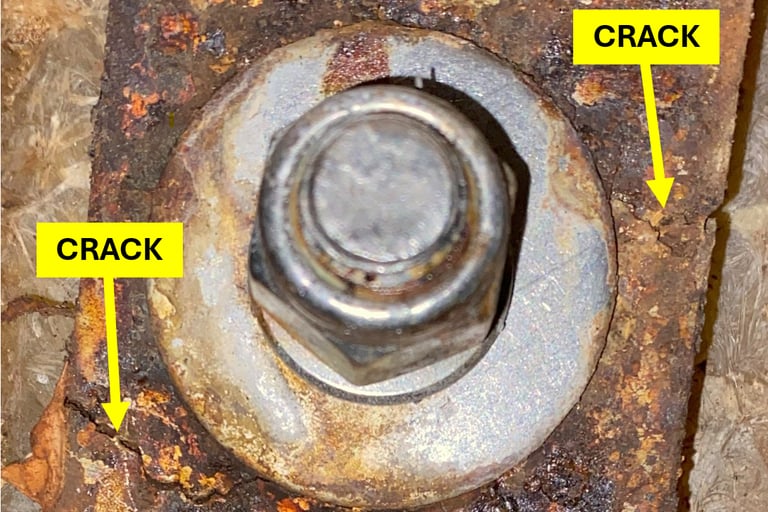
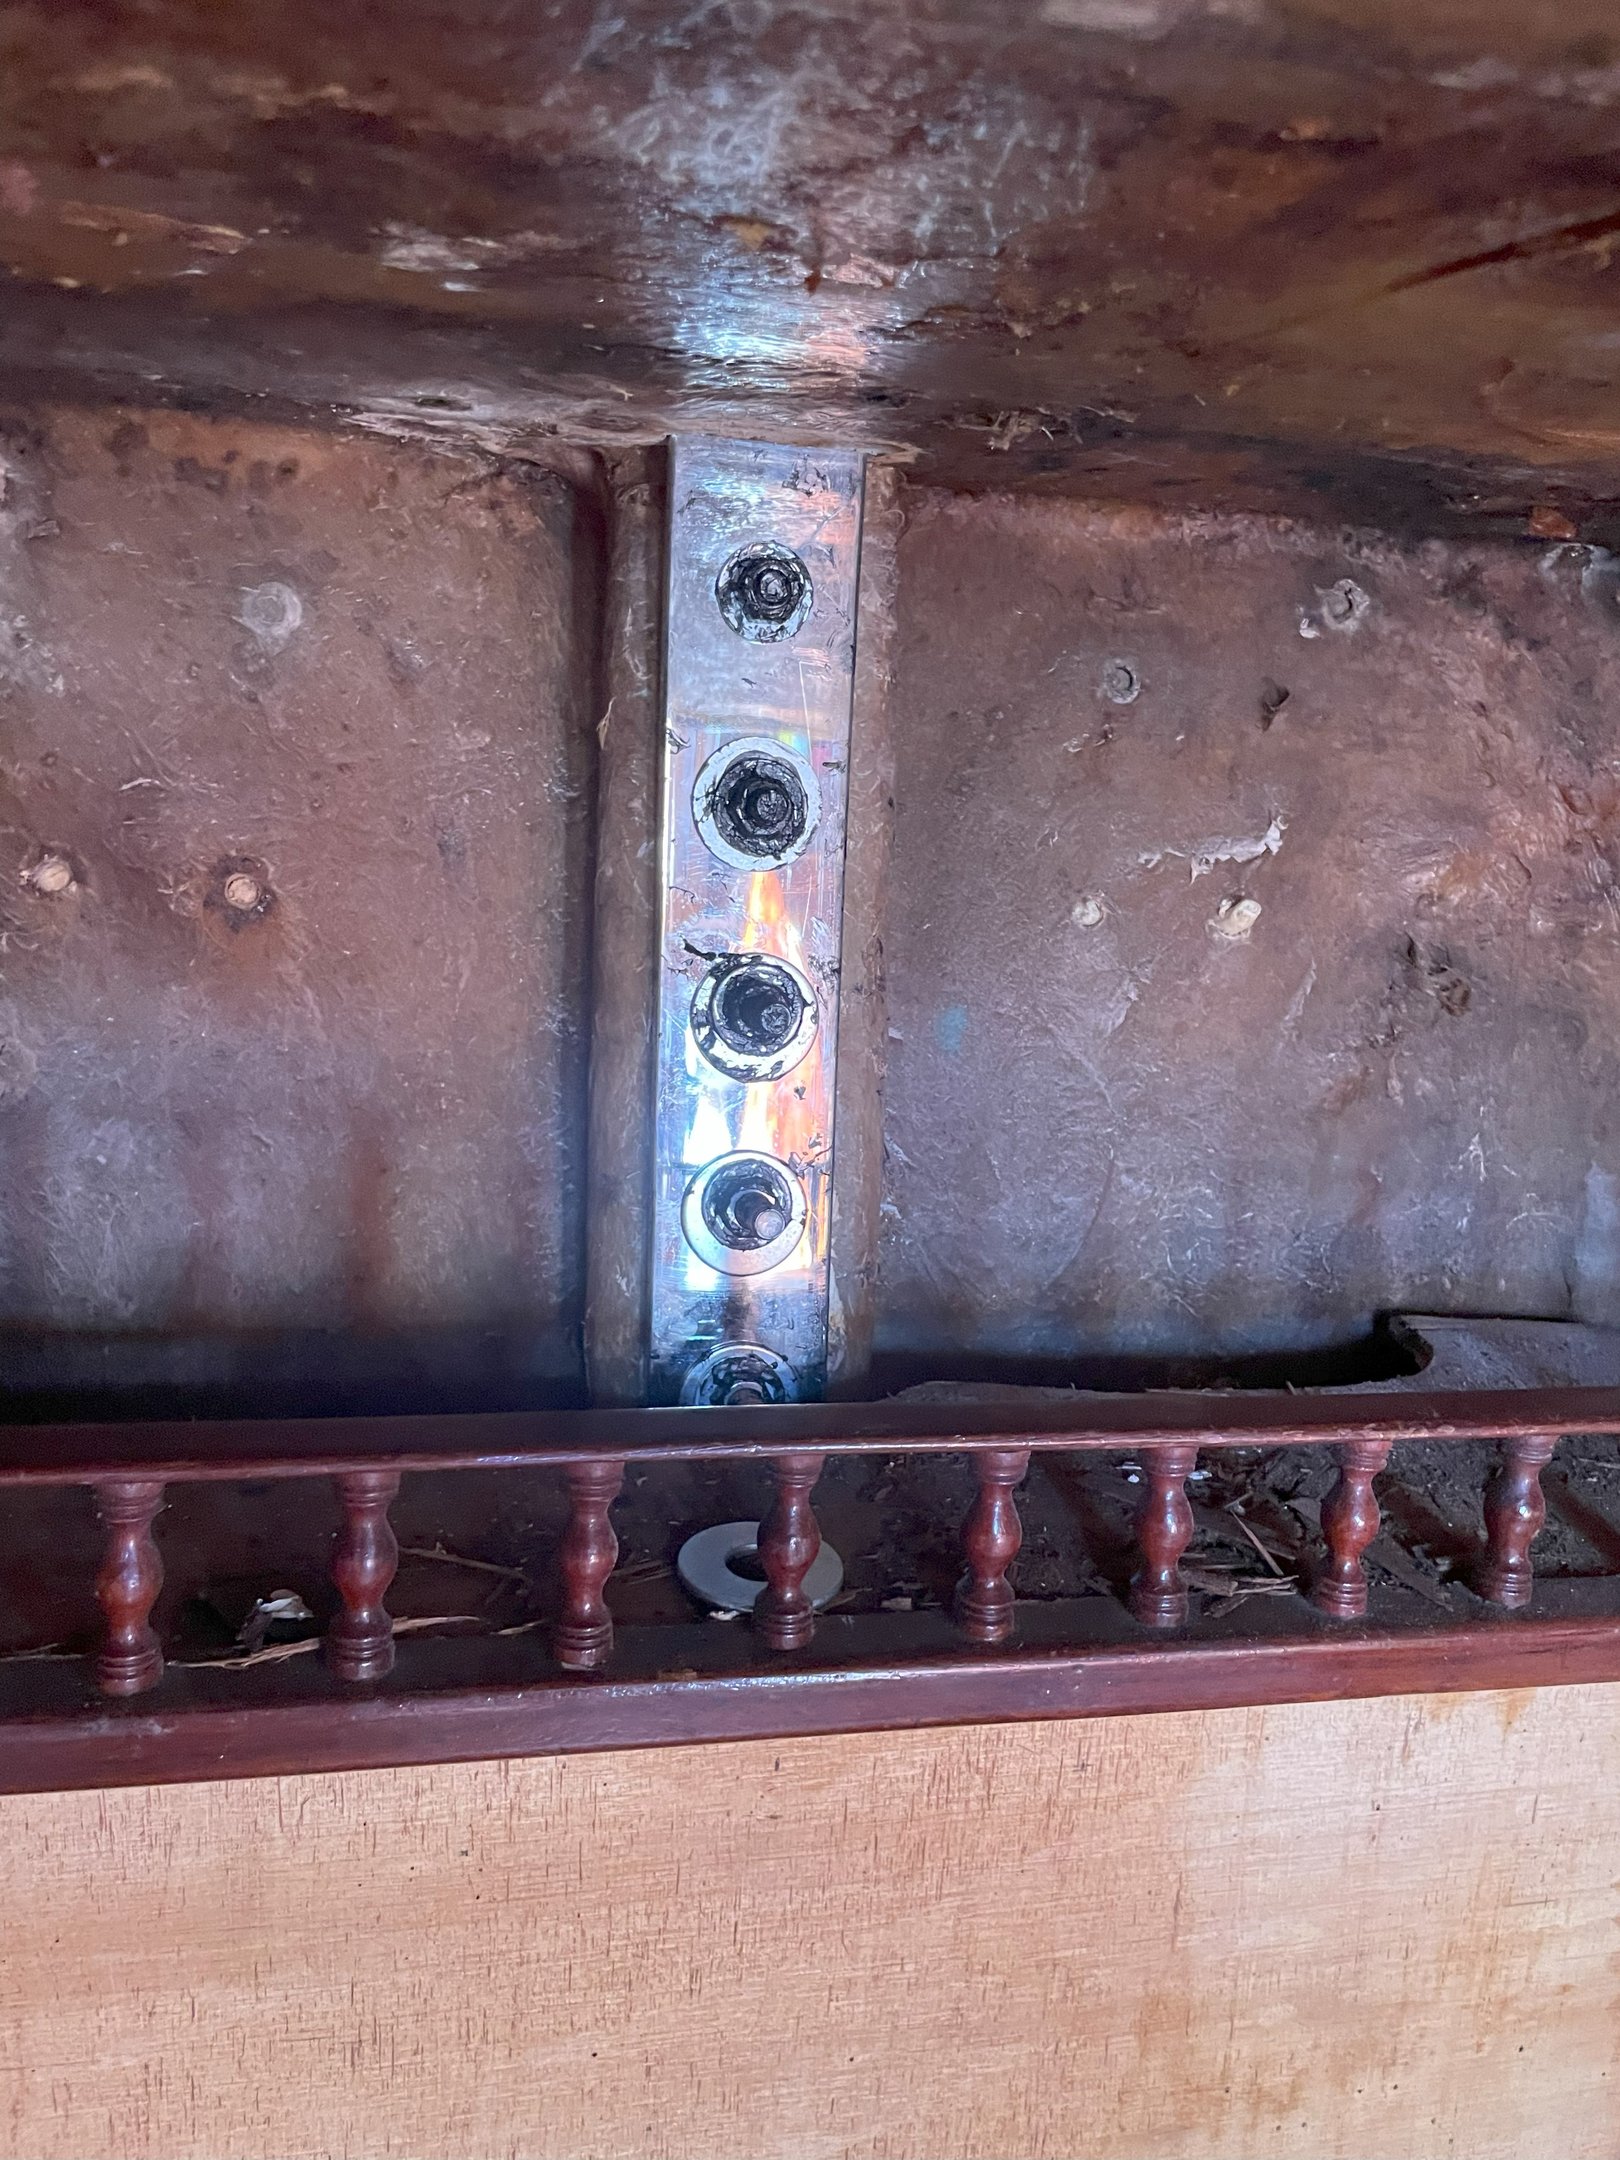
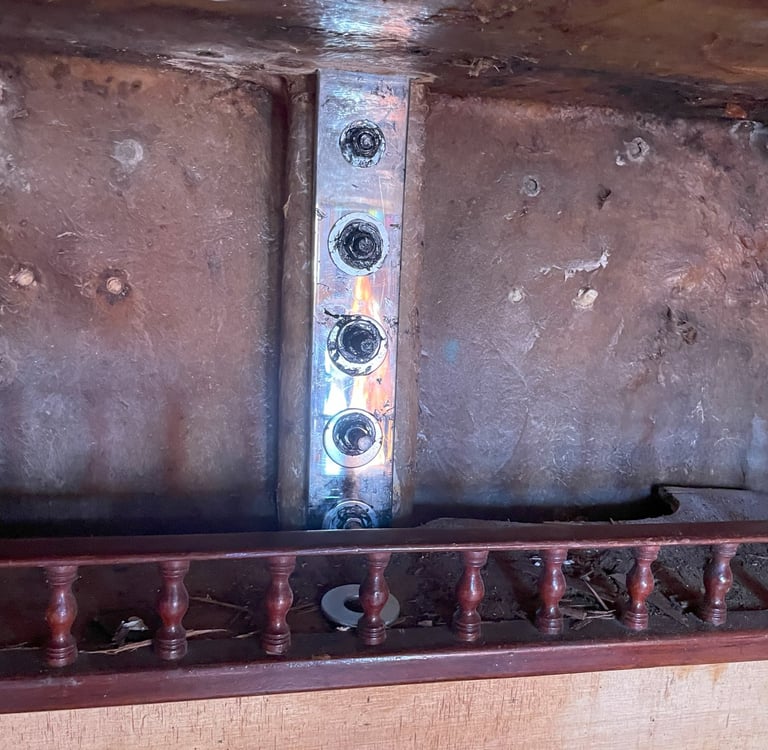
While renovating the aft cabin of Tauha, we found something that made our stomachs drop: a deep crack straight through the chainplate - right at the first bolt.
That’s not just cosmetic damage. The chainplate is what holds the backstay, the thick stainless-steel cable which adds tension to the mast from behind to keep it upright. If that fails mid-ocean, best-case scenario: the rig loses tension. Worst case? The entire mast comes down. We weren’t about to take that risk.
But time was tight, and we didn’t have a spare part. Chainplates are often custom-made and vary in design from boat to boat. Additionally we wanted one made out of stainless steel to avoid rusting through again. Finding a part like that in French Polynesia within a few days? Sounded nearly impossible.


🔍 The Hunt for a New Chainplate
We’d been to what felt like every boat shop on the north side of the island, growing more discouraged with each stop. Most vendors just shrugged. A few didn’t even know what a chainplate was. At our final stop, more out of desperation than hope, we asked the guy behind the counter if he happened to know a metalworker who could custom-make a part like this. To our surprise, he didn’t hesitate: “Actually, yeah. There’s a guy on the south side of the island. I’ve heard only good things. I’ll send you his WhatsApp.”
Welcome to island networking, where WhatsApp is king.
We sent the metalworker a quick sketch of the part along with a desperate plea. Within an hour, a response came back. He mentioned that he already had a stainless-steel piece that was almost the right shape. With a bit of extra work overnight, shaping and drilling, it could be ready by the next day, for a small additional fee for the night shift.
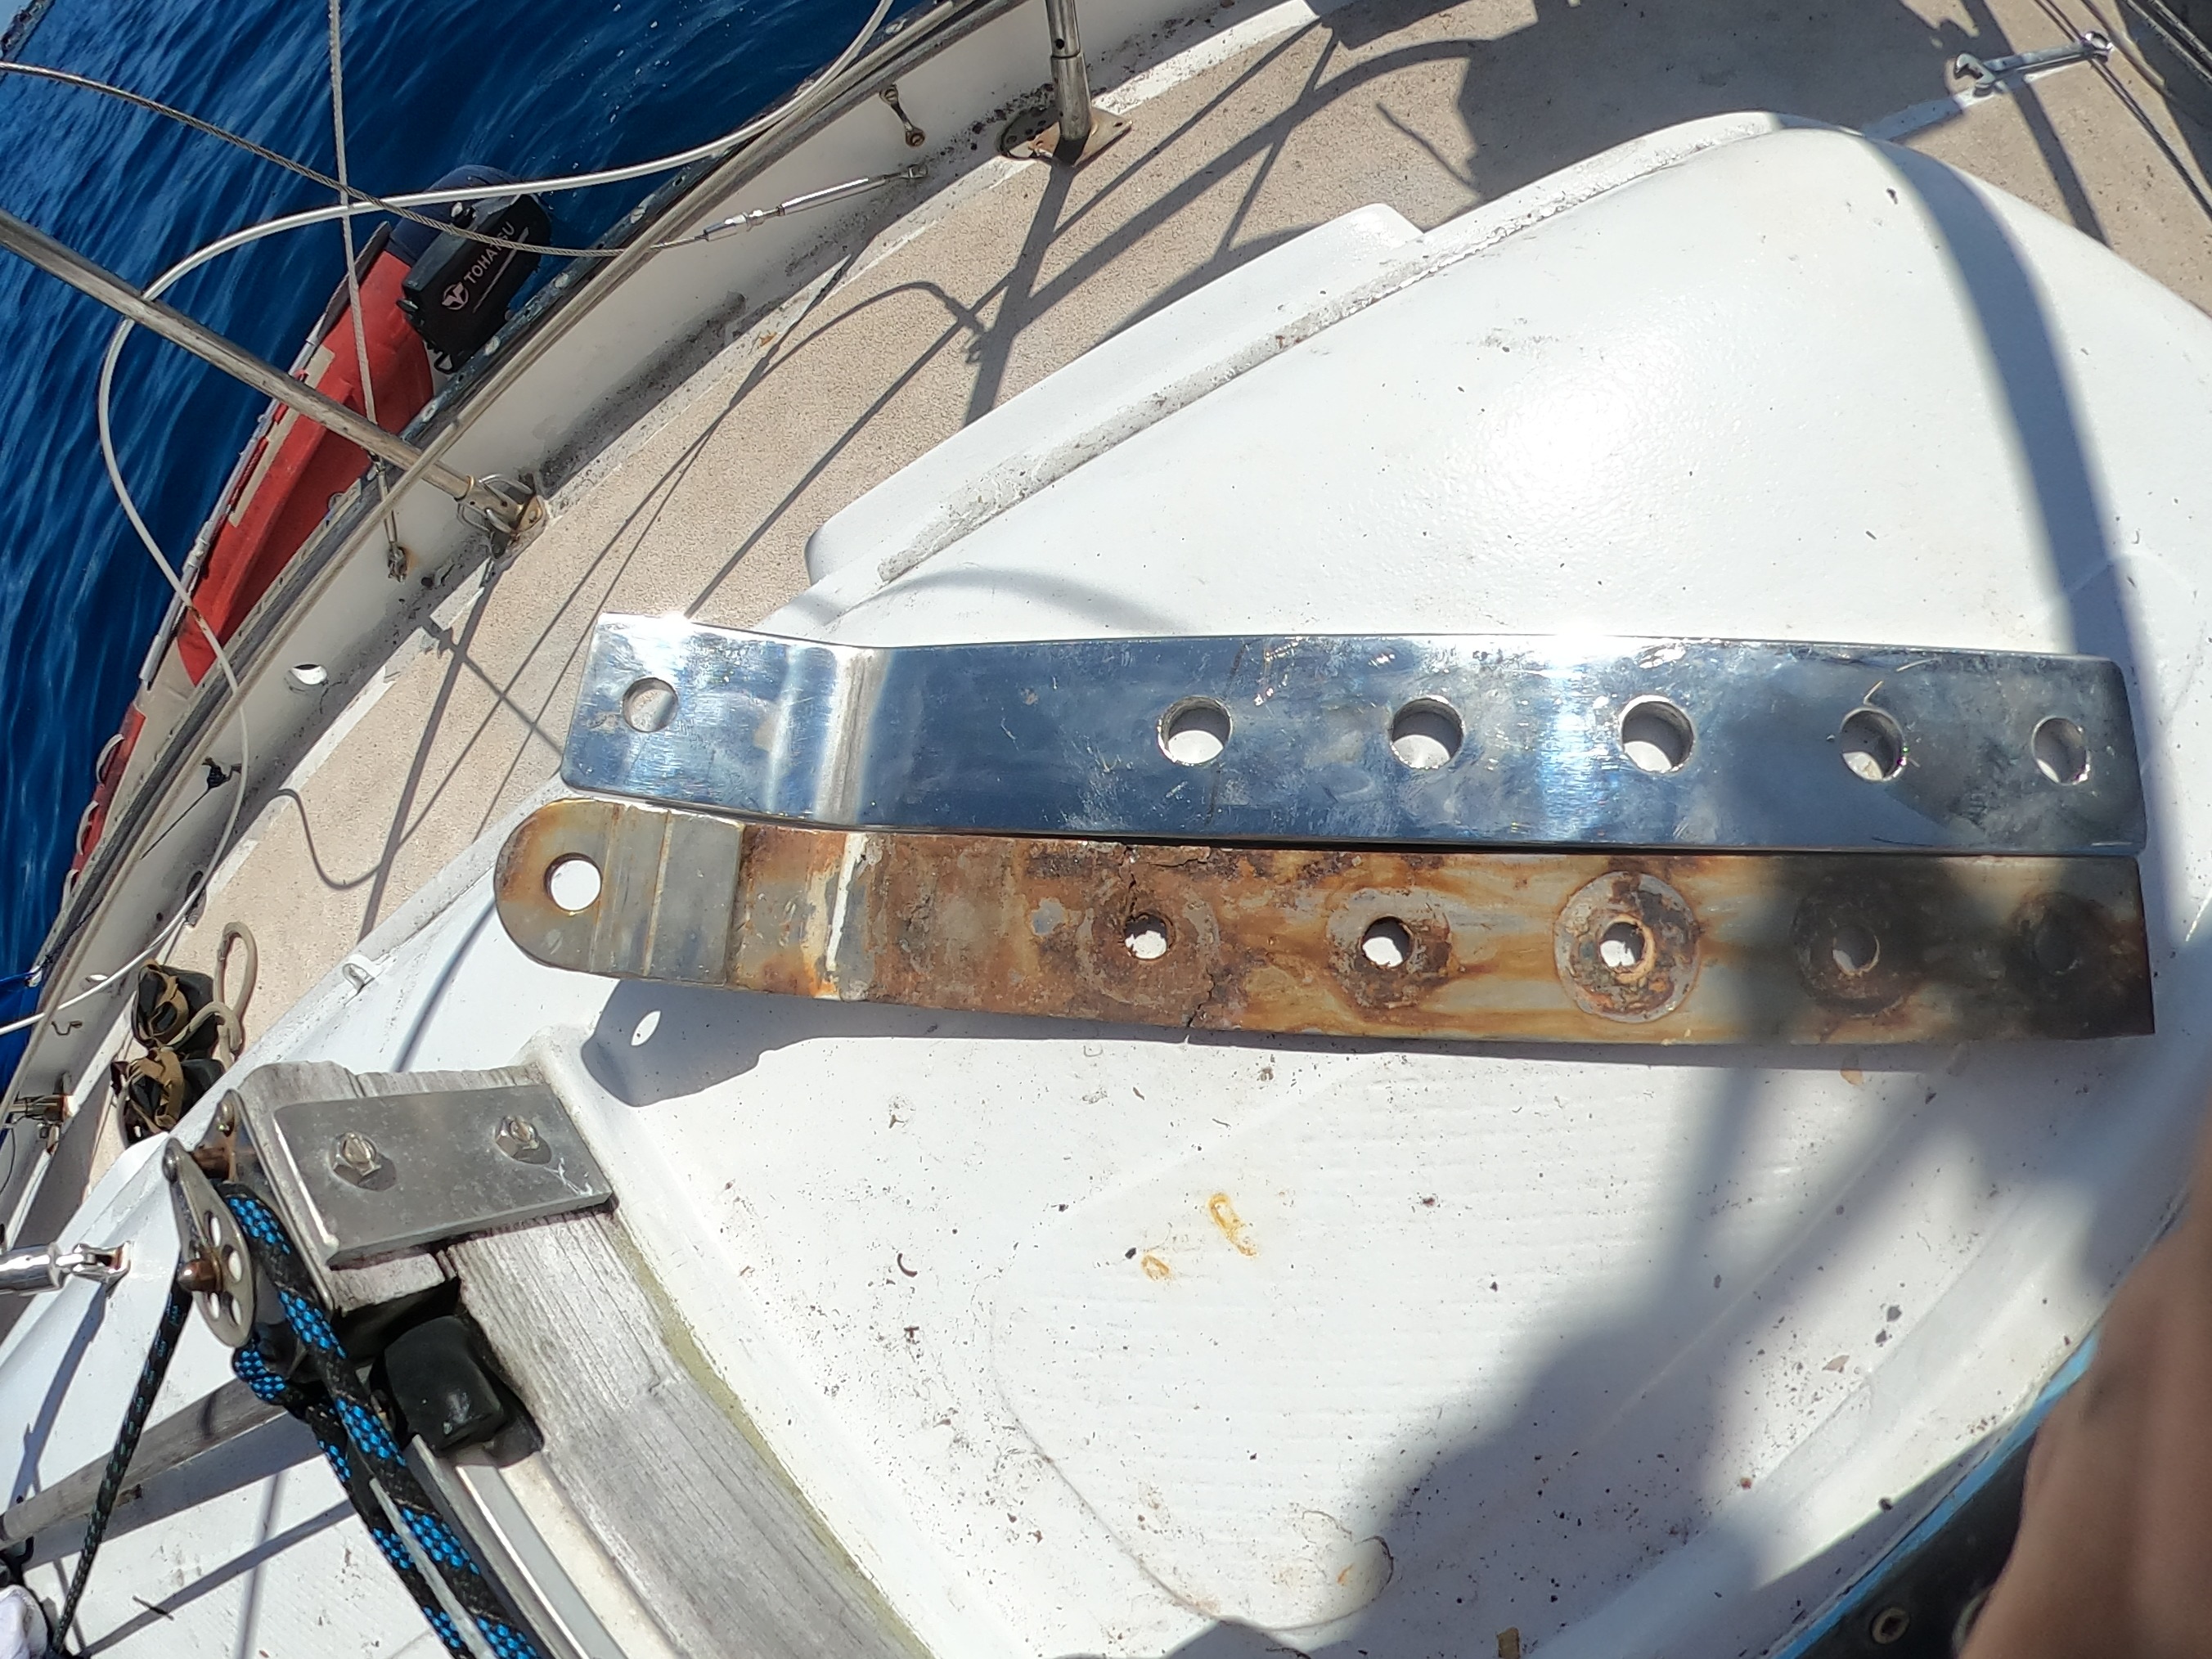
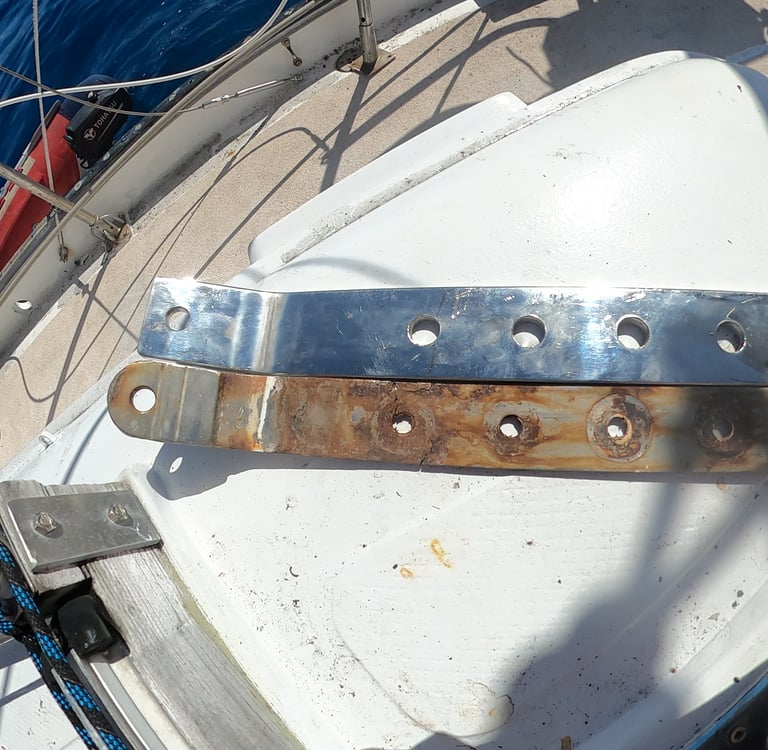
We couldn’t believe it. And sure enough, the next day we picked up a beautifully finished, custom-made chainplate from his little workshop on the south side of the island. It was heavier, thicker, and stronger than the original. Perfect.
🛠️ The Install
Now came the next challenge: installing it.
This is the kind of job you'd normally do with the boat on land and the mast unstepped. But Tauha was moored behind a reef, gently bobbing on turquoise water, and we had no time (or budget) for a haul-out.
Fortunately, the next morning brought perfectly calm weather. Time to get it done.
Step 1: Secure the Mast
We couldn’t risk the mast shifting while the backstay was disconnected.
Tighten the boom topping lift and the main sheet to help pull the mast backward
Crank the main halyard tight and secured it aft
Tie a safety line between the backstay and the chainplate to catch it if something slips
Step 2: Remove the Old Bolts
Five bolts held it in
I hung off the stern like a bat, gripping bolt heads halfway down the back wall of the boat with a wrench
Below deck, Alex was sweating in the aft cabin with a tiny wrench and, eventually, a hacksaw for the two bolts that refused to budge
Step 3: Remove the old Chainplate
Loosen the turnbuckle to disconnect the backstay from the chainplate.
With all bolts out and the cable detached, the chainplate could finally be pulled free. There it was, corroded, cracked, and clearly not something you'd want to sail with.
Step 4: Install the New Chainplate
The new one was slightly wider, so we filed the hull opening to fit
Once widened, it slid into place beautifully
The new bolts? Perfect match. Jackpot.
Step 5: Seal and Secure
We sealed all bolt holes and the chainplate with marine-grade Sikaflex, which turned out to be black (whoops). But it sealed beautifully.
The backstay was reconnected, the safety lines removed, and… Voilà, new chainplate installed.
💭 Final Thoughts
Changing a chainplate on a floating boat in tropical heat, with salt in your hair and sweat in your eyes? Not our favorite. But with a little luck, some island ingenuity, and a healthy dose of teamwork, it’s doable.
The good news! All the other chainplates still look solid. Let’s hope they stay that way. 🤞
⛵ Boat Terms Explained
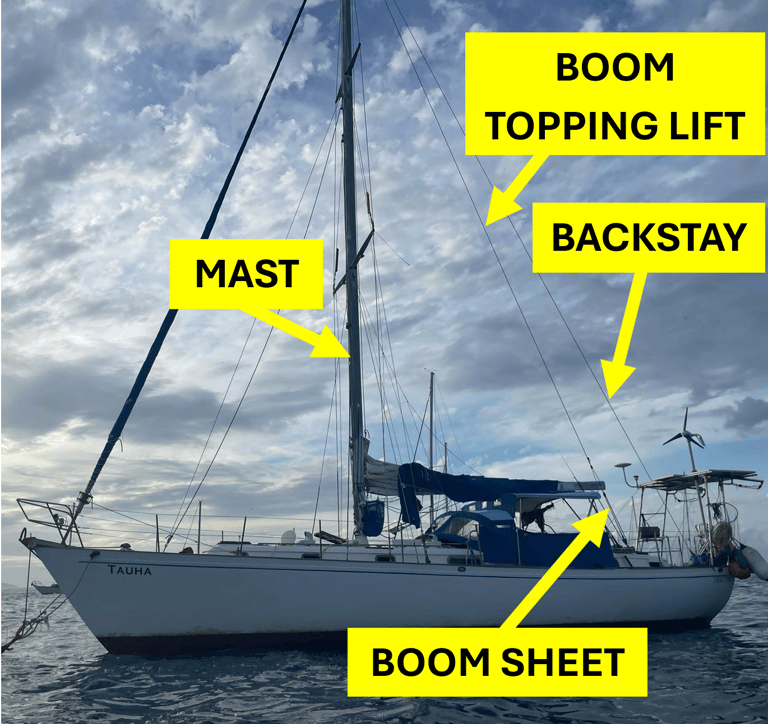
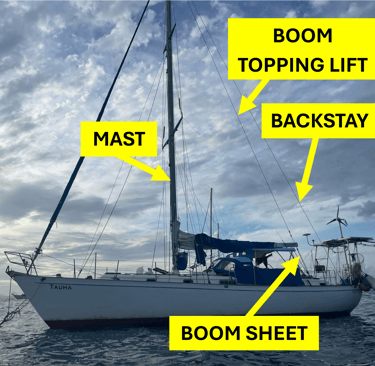
Chainplate - A thick stainless-steel plate bolted through the hull used to anchor rigging cables (like the backstay). It helps keep the mast upright and under proper tension.
Backstay - A tensioned cable running from the mast’s top to the stern. It prevents the mast from falling forward and stabilizes the entire rig.
Main Halyard - The line used to raise and tension the mainsail. Here, we used it to support the mast during the repair.
Boom Topping Lift - A line holding the boom up when the mainsail is down. In our case, it helped brace the mast rearward.
Boom Sheet - The line controlling the angle of the boom. Tightening it helped us keep mast tension while the backstay was off.
Turnbuckle - An adjustable metal fitting that connects the backstay to the chainplate and allows us to fine-tune tension
If you’d like to read more, follow our journey, and support what we do, don’t forget to subscribe to our newsletter or follow us on social media. Every bit of encouragement helps keep the adventure going and we’d love to have you aboard!